Creating a virtual network in Virtualbox
What is Virtualbox?
An overview
Virtualbox is a hypervisor that can be used to create virtual machines which act like seperate physical machines but are actually running on the host system hardware. They are exceedingly useful for trying out software on different operating systems, isolating malware for analysis and much more. In this context, the ‘host’ machine is the machine with the hardware that the virtual machines will be running on and the ‘guest’ machine is the virtual machine itself.
Why create a virtual network?
Like a virtual machine, a virtual network is a network of connected devices that acts like a real physical network but is actually only being emulated. There are many different uses for emulating a network like this, but my current plan is to create this network to experiment with setting up virtual servers that my virtual client machines can connect to.
Creating the virtual network
Requirements
As stated before, my current plan is to create two virtual machines both connected in the same virtual network. This will allow the first virtual machine to communicate with the second a vice versa. I also want the first virtual machine to be able to communicate with the host machine’s network so it can access the internet. There are two different options that I could use to accomplish this, which are detailed below.
NAT and bridge networking
In NAT networking, Virtualbox creates an interface that acts as a router to the virtual machine, allowing it to communicate with the host network and, as a result, the internet. However, this implementation also prevents any devices on the host network from communicating with the virtual machines and also prevents different virtual machine running at the same time from talking to each other as each virtual machine would have its own router interface.
In bridge networking, Virtualbox sets up the virtual machine as if it was directly connected to the host’s network. This allows it to communicate with devices on the host’s network and for those devices to also communicate with the virtual machine.
From a security perspective, NAT addressing would be more useful as for the requirements that I outlined, the virtual machine does not need machines on the host’s network to communicate with it. Therefore, I will be utilising NAT addressing.
Implementing the virtual network
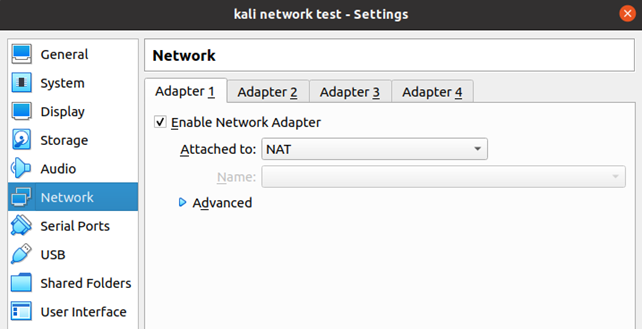
Implementing the NAT on the first virtual machine is easy enough as it is usually enabled by default on Virtualbox as you can see below.
To confgiure communication between the virtual machines, a host-only network method will be used. This method allows for a DHCP server to be utilised so IPs can be dynamically assigned to the machines on the virtual network. Internal networking is also an option but requires the use of static IP addressing. A host adapter first needs to be created which can be seen below along with its DHCP server settings.
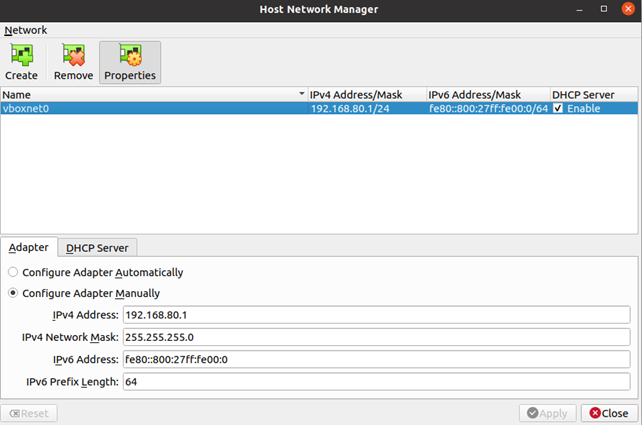
As shown above, an adapter was made for the virtual network of 192.168.80.0/24. The ‘/24’ indicates that the network can utilises the addresses 192.168.80.1 – 192.168.80.254 (for a total of 253 possible machine IPs). 192.168.80.255 should not be assigned to a device on the network as it is a broadcast address.
After creating this adapter, I can assign it to the second adapter on the first virtual machine and the first adapter on the second virtual machine as seen below.
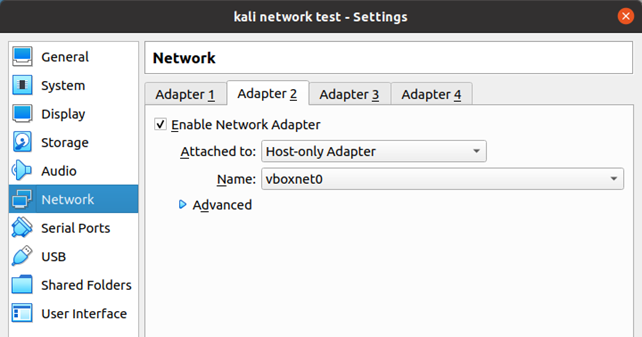
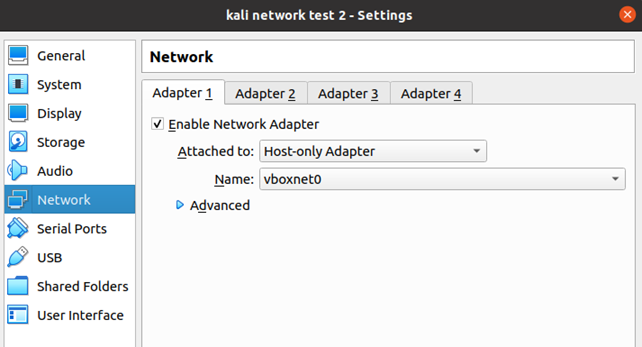
These two devices should now be able to communicate with each other, where the first can access the internet but the second cannot.
Testing
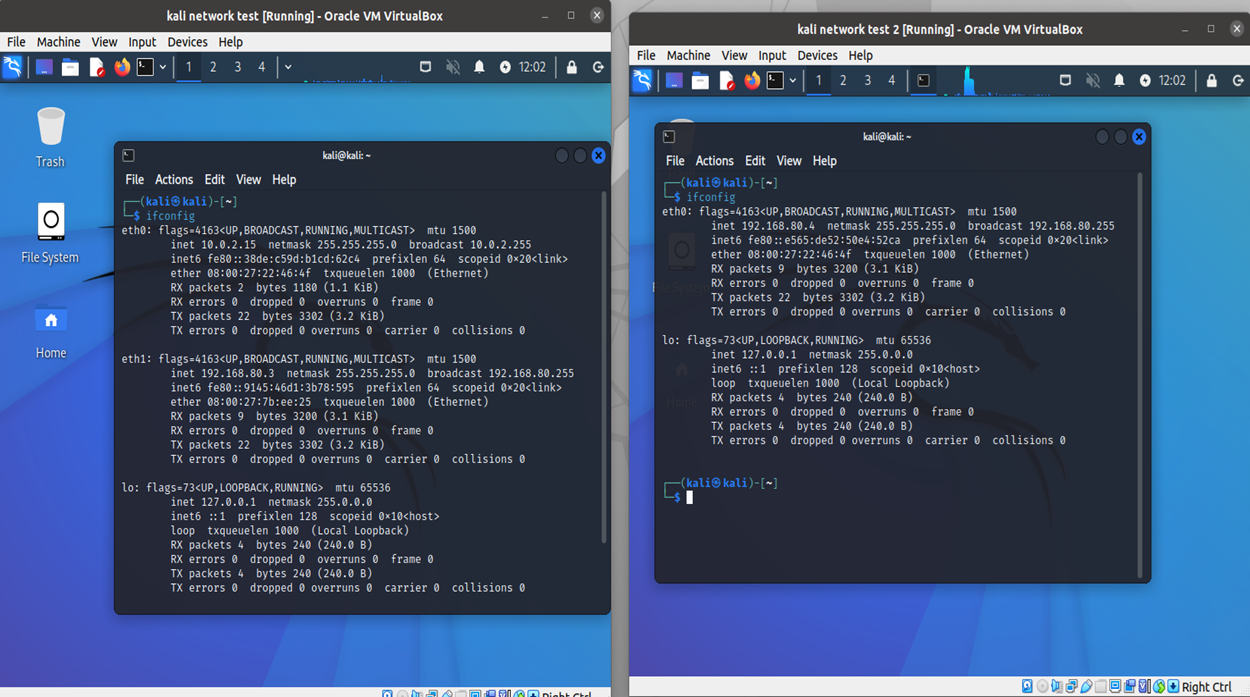
Running ifconfig displays the IPs for both the virtual machines which is seen below. The one on the left is the one that can communicate with the host network.
To check connectivity, we can conduct some tests which can be seen below.
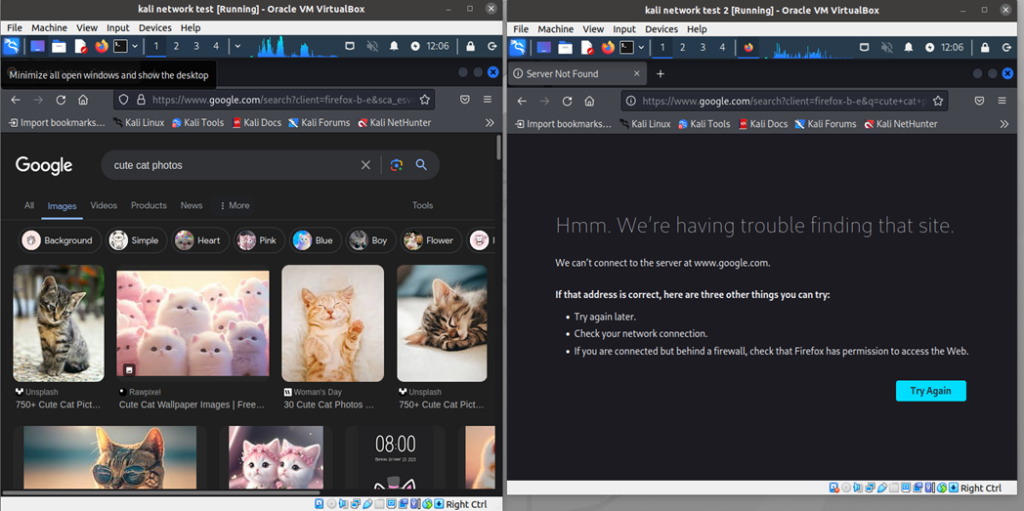
As shown above, the first machine (top) can search cute cat photos on the internet, while the second machine (bottom) cannot :(.
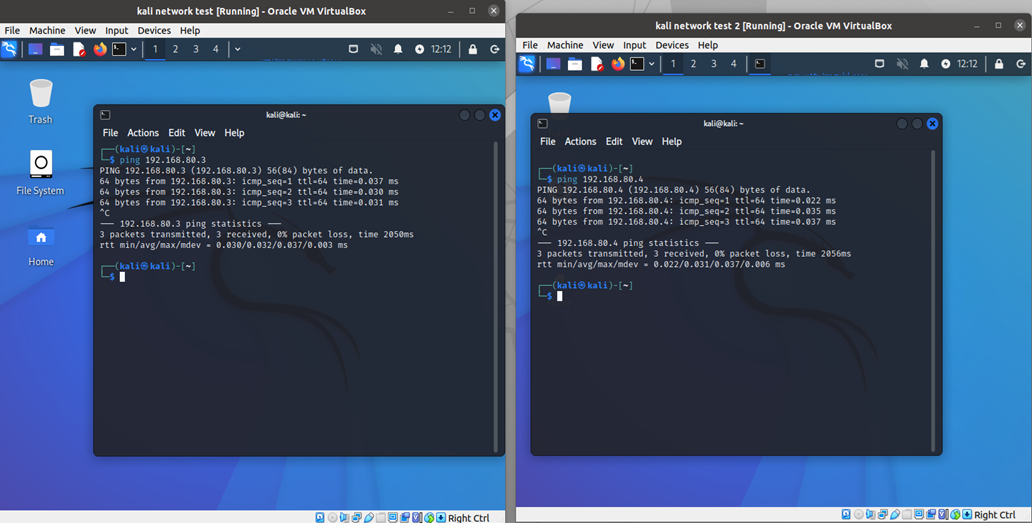
Testing if the two machines can ping each other also succeeds as seen above. Since all the tests have passed, the virtual network has been successfully created!
Conclusion
The virtual network that I set up above will be very useful for future projects. If you followed this to set up your own virtual network in Virtualbox I hope it helped!
References
Below are some of the resources that I used when writing this article.